The measurements that matter are on each product page, because they differ between garments. This page explains how to use them and get it right first time.
Measure a garment, not yourself
This is the single most useful thing on this page. Do not measure your body. Measure a shirt you already own and like the fit of.
Body measurements tell you almost nothing about how a garment will sit, because fit depends on how much room the pattern adds. Comparing garment to garment removes all the guesswork.
Lay a shirt you love flat on a table, smooth out the wrinkles, and take these three:
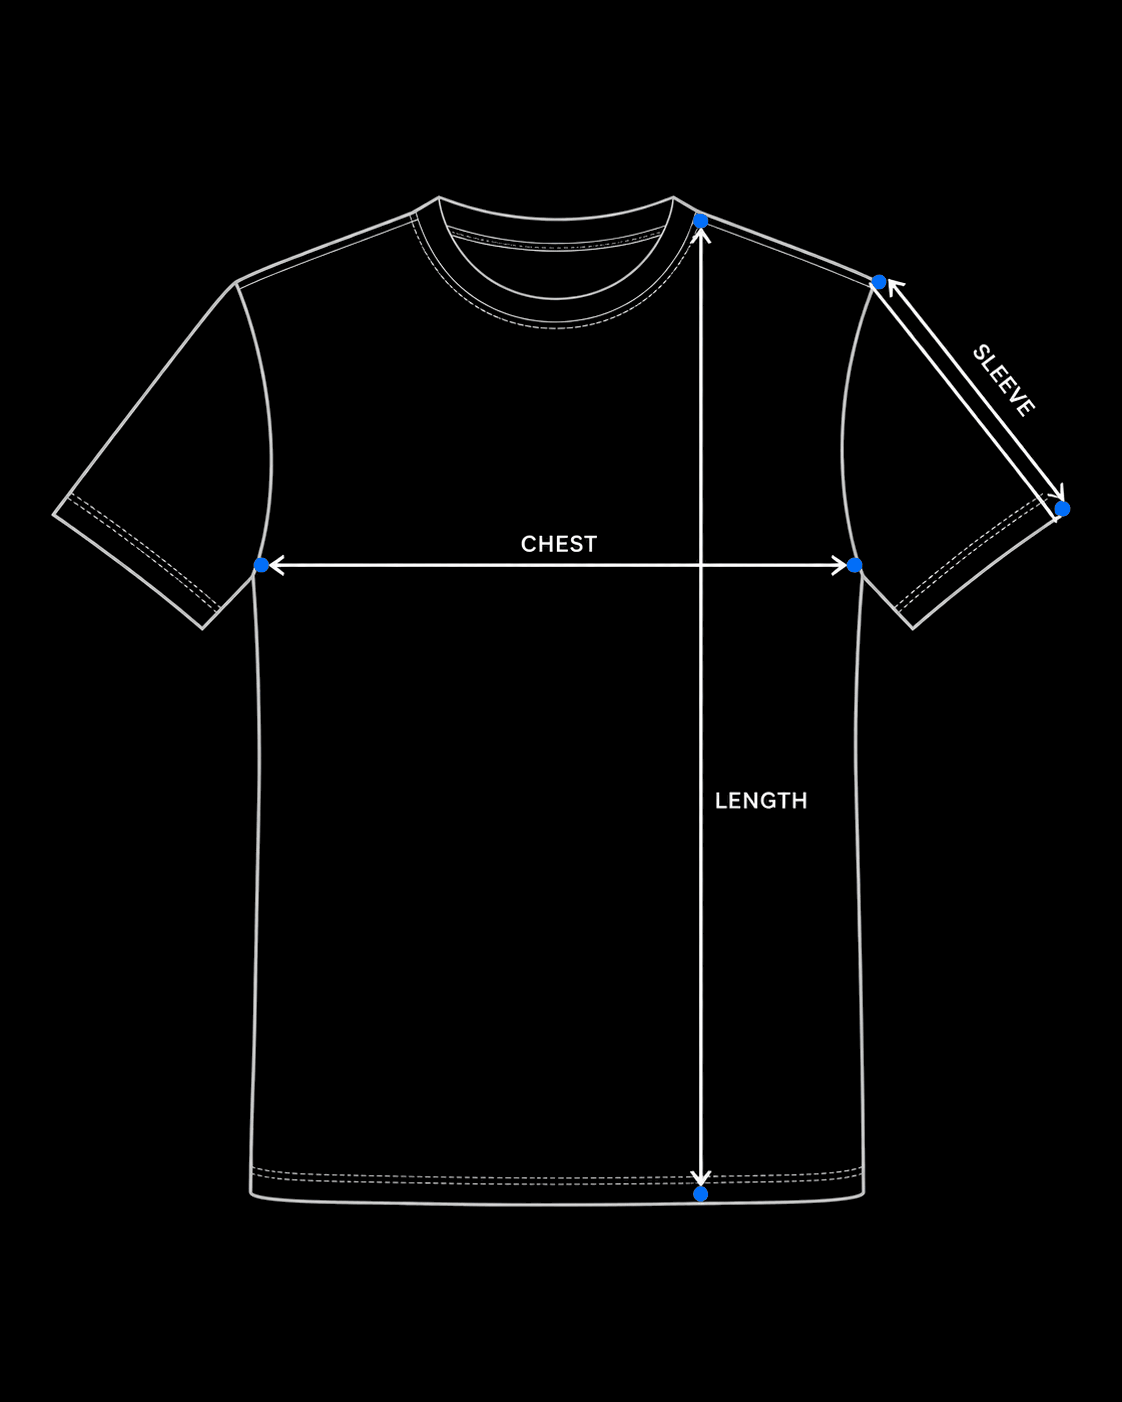
- Chest. Straight across, from armpit seam to armpit seam. Do not go around the garment. Our charts list this flat measurement, so yours must be flat too.
- Length. From the highest point of the shoulder straight down to the bottom hem.
- Sleeve. From the shoulder seam to the end of the sleeve.
Then find the closest match on the product page. The closer the measurements are, the closer the fit will feel.
How our things fit
- Tees are a relaxed unisex cut. Straight through the body rather than tapered. If you want it fitted, size down. If you want it properly oversized, size up one and expect the shoulders to drop.
- Hoodies run generous and are designed for layering. Start with your usual size, then compare the measurements on the product page.
If you are between sizes
Size up for tees and hoodies. A slightly roomy shirt looks intentional. A slightly tight one does not, and it is the more common regret.
Still not sure
Email hello@nullifier.io with the measurements of a shirt that fits you well and tell us which product you are looking at. We will tell you which size to take. This takes us two minutes and saves you the problem described on our returns page, since made-to-order items cannot be exchanged for a different size.
A note on the numbers
Garments are cut in batches and every chart carries a tolerance, usually around 2cm. That is normal manufacturing variation across the whole industry rather than a quality problem.